
How to install a Docker?
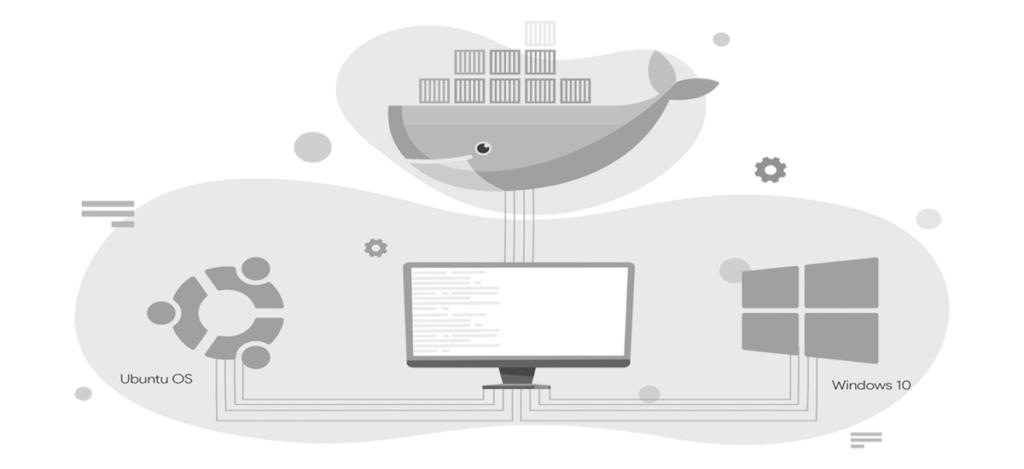
This how-to article contains instructions for installing Docker on Ubuntu OS (>= 18.04) and Windows 10 OS.
HISTORY
Docker is a tool designed to make it easier to create, deploy, and run applications or Data Science models in our case, by using Containers. Before we go and install Docker, let us get familiarized with the history behind it.
WORLD BEFORE DOCKERS
Whenever an application needs to be deployed to Production, the required hardware machines need to be procured and all the necessary installations and set-up done. Procuring different hardware machines for different applications increased the maintenance cost and labor. So, they came up with something called Virtualization.

Workings of a Virtual Machine
It is a technique of creating a Guest Operating System on top of a Host Operating System. For instance, if I built an application that needs Ubuntu OS System (Guest) to run but I’ve Windows OS(Host), all I need to do is install a Virtual Machine(VM) which can Host Ubuntu OS. Similarly, I can install multiple VM’s to run different Operating Systems based on the capacity of my Host OS. This method eliminates the need for separate hardware machines to run different applications written in different languages and have various dependencies.
However, each Virtual Machine had the entire Operating System installation and required software set-up and installation. To run just one application and not utilizing the other features of an Operating System seems like overkill.
Disadvantages of Virtulization

LEADS TO PERFORMANCE DEGRADATION
As different Guest Operating Systems are running on the same Host Operating Systems. The Guest OS has its kernel, libraries, and dependencies and thus takes up a large portion of system resources, i.e, hard disk, processor, and especially RAM.

BOOT UP PROCESS IS TIME-CONSUMING
In this world of instant messaging, how practical is it for us to wait for an application to run? What happens when it is a real-time application? Do consumers have enough time on their hands to wait for an application to open?

THEY ARE HEAVY
As different Guest Operating Systems are running on the same Host Operating Systems. The Guest OS has its kernel, libraries, and dependencies and thus takes up a large portion of system resources, i.e, hard disk, processor, and especially RAM.
These disadvantages are overcome by Containerization where Docker comes into the picture.
What is Containerization?
While Virtualization eliminates the need of having separate hardware to run applications on different Operating Systems, Containerization eliminates the need of having to install separate Operating Systems to run different applications.
How docker works
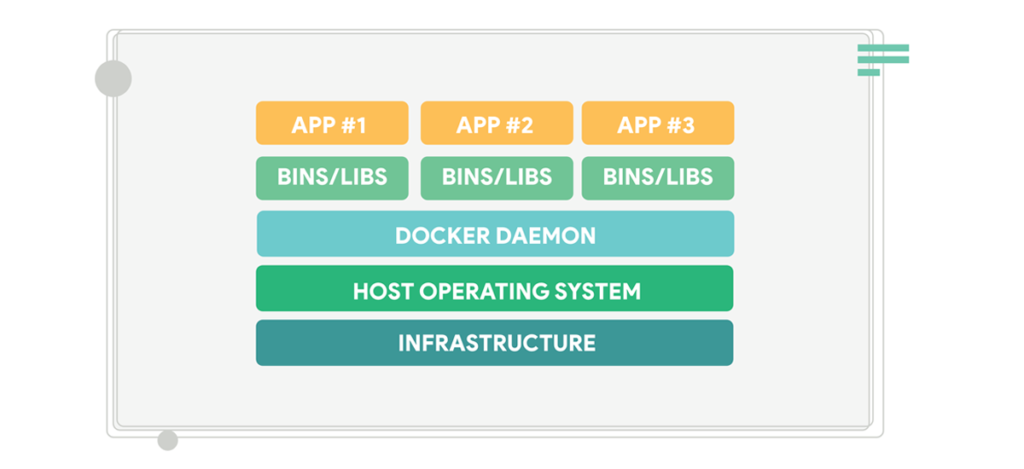
The picture on left summarizes the architecture of how a Docker Container runs on a Host Operating System. There are alternatives to Docker to Containerize your applications which include, Rancher, Apache Mesos, LXC Linux Container, etc., but Docker proves to be the most lightweight and easy-to-use software when it comes to Containerizing your applications or Data Science models.
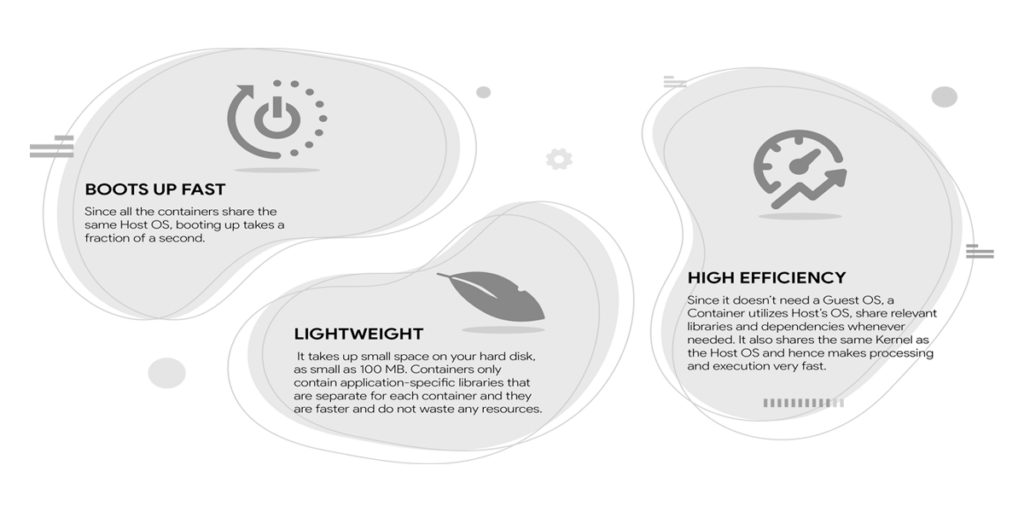
Advantages of Containerization
While Virtualization eliminates the need of having separate hardware to run applications on different Operating Systems, Containerization eliminates the need of having to install separate Operating Systems to run different applications.
Brief Introduction to Docker
Docker is a containerization platform that packages your Data Science model or any application and it’s respective libraries and dependencies in the form of Containers. You can run these containers in any environment seamlessly.
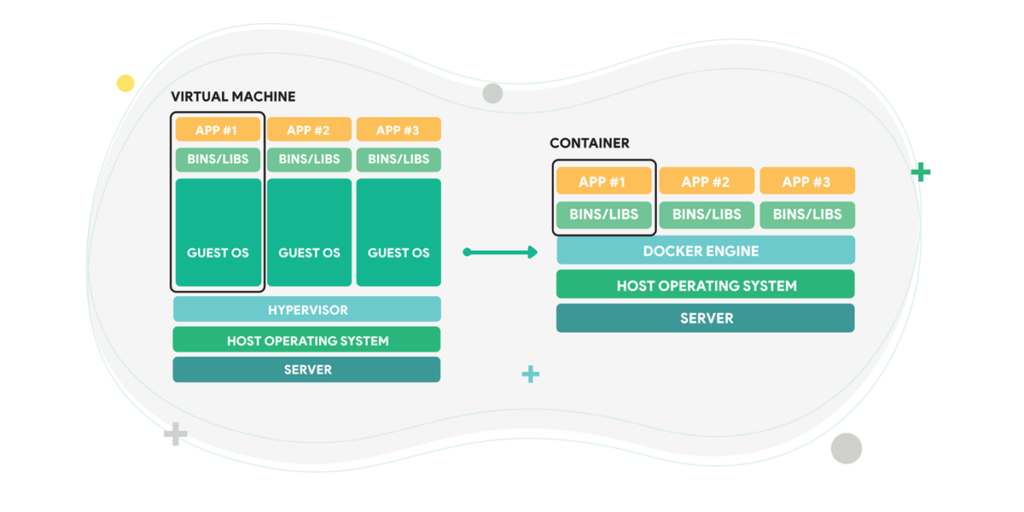
VIRTUAL MACHINE TO DOCKER
Each Docker container would have the minimum required OS components, libraries, and binaries required for running a Data Science model or an application. This way Docker Containers proved to be very lightweight and fast. After you install Docker on your machine, you have a single Operating System (Host) on top of that there is Docker Engine that is running. On top of this Docker Engine, each application or model will be running as Docker Containers.
These containers have their own set of dependencies and libraries. This makes sure that each application is independent of other applications which do not interfere with one another. So a developer can build a container having different applications installed on it and give it to the Quality Assurance (QA) team. Then the QA team would only need to run the container to replicate the developer’s environment instead of installing an entirely new OS and dependencies. This also ensures that the working environment is consistent, starting from the development of deployment. Now, in the software industry, whatever application is to be deployed can be dockerized into a Docker Container and deployed in any OS/machine running Docker.
Architecture of Docker
Docker Client Where the command is issued from the client
Docker Host Has a Docker daemon and takes off the containers and images.
Docker Registry Serves as a repository for images.
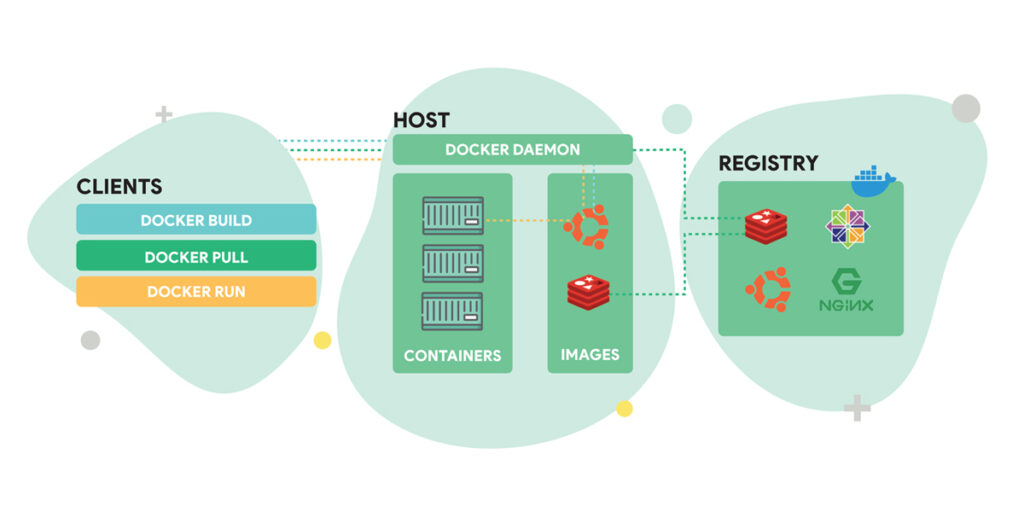
HIGH-LEVEL ARCHITECTURE OF DOCKER
Install Docker
On Ubuntu OS (≥ 18.04)
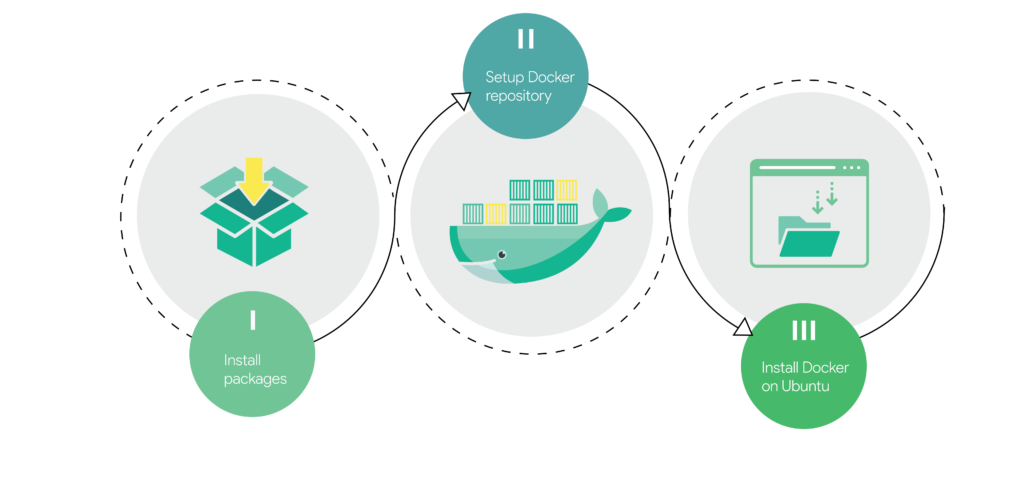
Enough with the theory, let’s go ahead and install Docker on Ubuntu OS. Following are the steps:
- Install the required packages
- Setup Docker repository
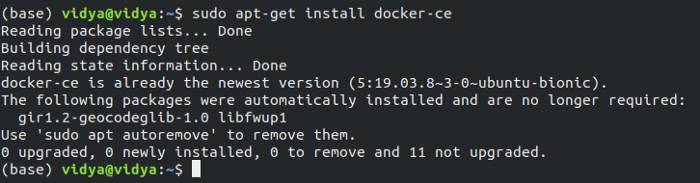
- Install Docker On Ubuntu
STEP 1: INSTALL THE REQUIRED PACKAGES:
To ensure we get the latest version, we’ll install Docker from the official Docker repository. To do that, we’ll add a new package source, add the GPG key from Docker to ensure the downloads are valid, and then install the package.
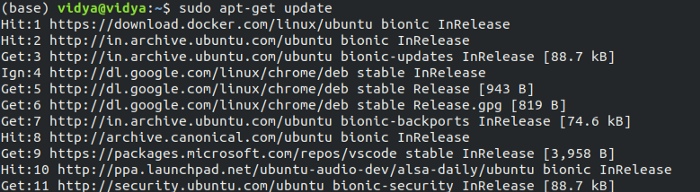
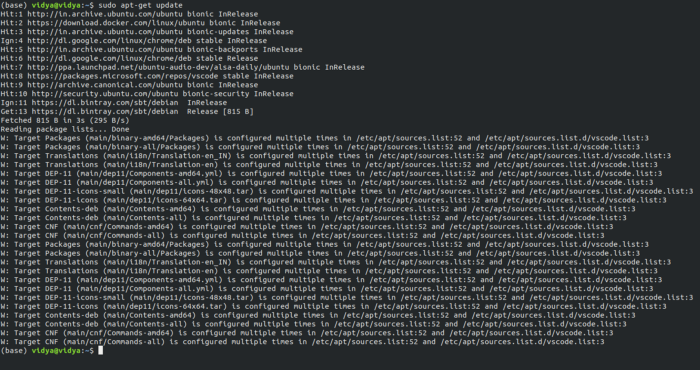
Update your existing list of packages:
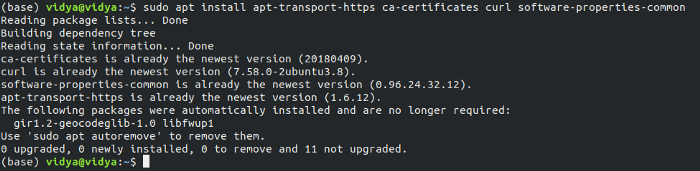
Install the required packages:
sudo apt install apt-transport-https ca-certificates curl software-properties-common
STEP 2: SETUP DOCKER REPOSITORY
curl -fsSL https://download.docker.com/linux/ubuntu/gpg | sudo apt-key add –

Now, add the Docker repository on your Ubuntu system which contains Docker packages including its dependencies:
Install the required packages:
sudo apt install apt-transport-https ca-certificates curl software-properties-common
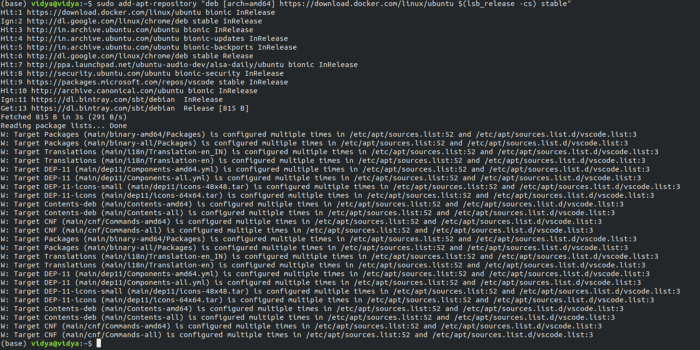
Update the package database with the Docker packages from the newly added repo:
sudo apt-cache policy docker-ce
Notice that docker-ce is not installed, but the candidate for installation is from the Docker repository for Ubuntu 18.04 (bionic).
The output should be something like this:

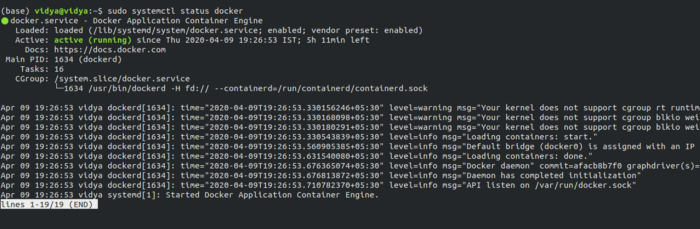
Congratulations! You have successfully installed Docker. Check if it’s running:
The output should be similar to the following if it is active and running:
To check whether you can access Docker Images from Docker Hub, run:
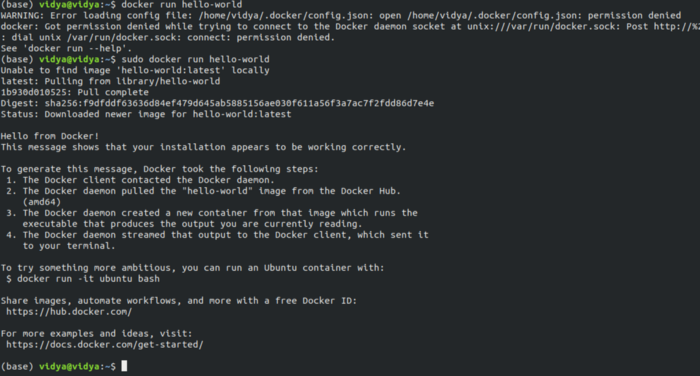
Installing Docker now gives you not just the Docker service (daemon) but also the docker command-line utility, or the Docker client.
If you’ve observed in the above step, I tried to run the docker without using sudo but it throws me an error saying permission denied. If you’re someone like me who needs to extensively use docker from today or just to practice docker commands, typing sudo every time would seem impossible and irritating. So, let’s do something about it.
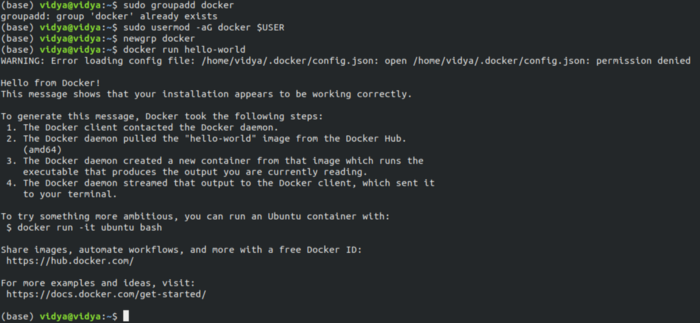
Executing Docker Commands without using sudo
1. Create Docker Group
2. Add your user to the docker group.
3. Log out and log back in so that your group membership is re-evaluated.
On Linux, you can also run the following command to activate the changes to groups:
4. Verify that you can run docker commands without sudo.
The output should look something like this:
If you want to further remove the .json error, even though it wouldn’t affect running your docker in any way, just for sanity’s sake, follow the below commands:
To fix this problem, either remove the ~/.docker/ directory (it is recreated automatically, but any custom settings are lost) or change its ownership and permissions using the following commands:
sudo chown “$USER”:”$USER” /home/”$USER”/.docker -R
sudo chmod g+rwx “$HOME/.docker” -R
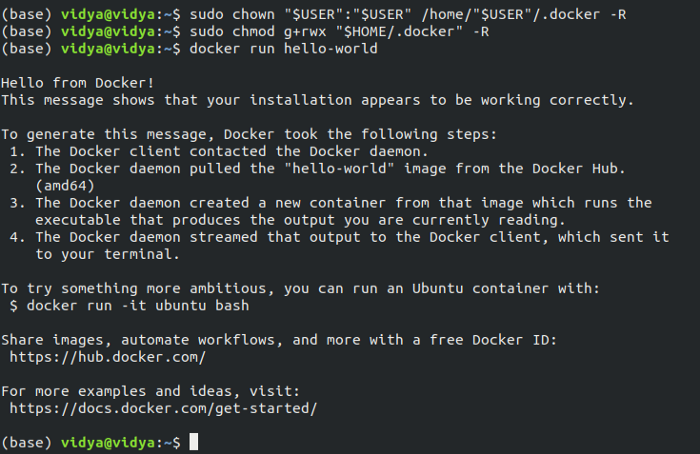
Finally, all the errors are gone. Congratulations, you’ve completed installing Docker on your Ubuntu OS.
On Windows 10 OS
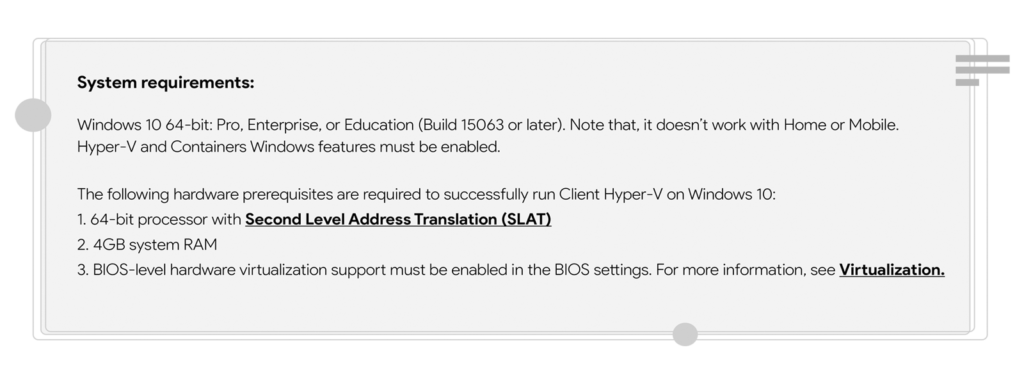
Let’s first go through the steps which are required before installing Docker on Windows 10.
Let’s start.
Step 1: Assuming you have the correct version of Windows 10, let’s go ahead and enable Containers and Hyper-V Windows features.
- Open ‘Windows Powershell’ and run it as administrator.
Enabling Containers with the following code on your Powershell:
Enable-WindowsOptionalFeature -Online -FeatureName containers –All
Press ‘y’ when prompted for a restart.
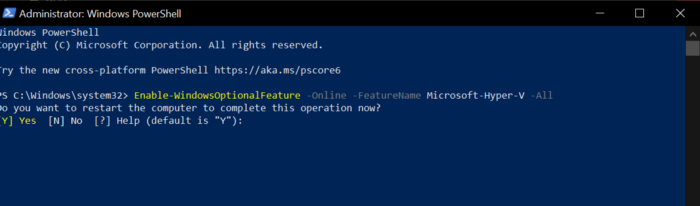
Enabling Hyper-V on your Powershell:
Enable-WindowsOptionalFeature -Online -FeatureName Microsoft-Hyper-V –All
Press ‘y’ for another reboot.
Step 2: BIOS-level hardware virtualization support must be enabled in the BIOS settings. First, let’s check if it is already enabled or not.
- Search for ‘Task Manager’ and open it.
- Under the ‘Performance’ tab you should see if Virtualization is Enabled or Disabled.
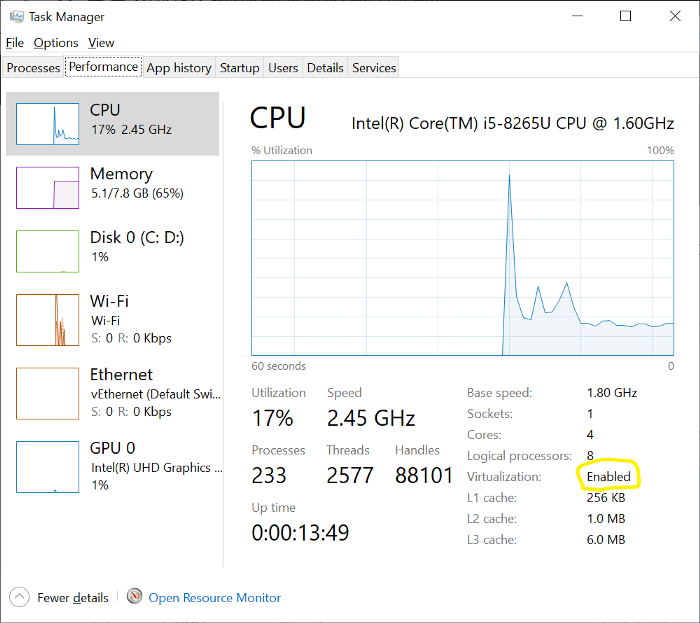
If it is Disabled, please follow this article for an easy to follow instructions on how to enable Virtualization.
Now that we’re done with the System Requirements, we shall move forward and start installing our Docker.
Docker Desktop for Windows is the Community version of Docker for Microsoft Windows. You can download Docker Desktop for Windows from Docker Hub. Please Click Here.
- After installing, double click on Docker Desktop Installer.exe.
- It will prompt you to choose whether to use Windows Containers instead of Linux Containers. Use Linux for Containers, it is always the best option. So, don’t check that box.
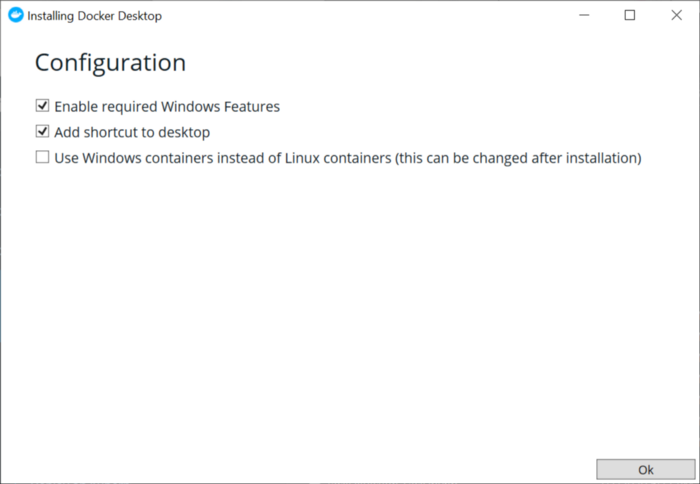
- Then, click Ok. It will start installing the packages.

- Once the installation is done, it will prompt you to Log Out. Click on it.
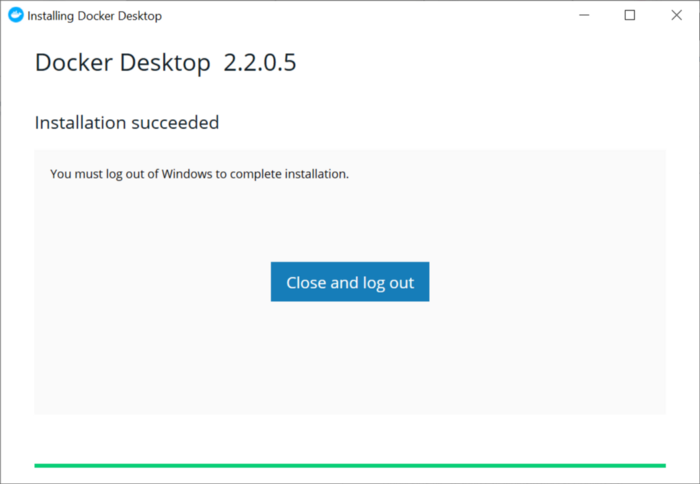
After logging in, you’ll have a pop window like below. Enter your ID and password to run Docker Desktop.

- You can also see your taskbar for a whale icon.

Now, let’s first check the version of the docker:

- Pull the hello-world image from Docker Hub and run a container:

- Explore the Docker help pages by running some help commands:
docker –help
docker container –help
docker container ls –help
docker run –help
Congratulations! You’ve successfully installed Docker on your Windows 10 and is up and running!
We’ve come to the end of this article. I would like to hear if you’ve successfully installed Docker following our instructions. If not, please post the screenshots of your errors, we would be glad to take a look at them and try to solve it for you. I will be looking forward to seeing you on how to make a Dockerfile, build a Docker Image, and run a Docker Container.