How to create a Flutter App on both iOS and Android.
In this article, we are going to go over the steps to be followed while creating a Flutter Application on both iOS and Android platforms.
To learn about why we chose Flutter for our Mobile App Development, click here.
SETTING UP THE FLUTTER ENVIRONMENT
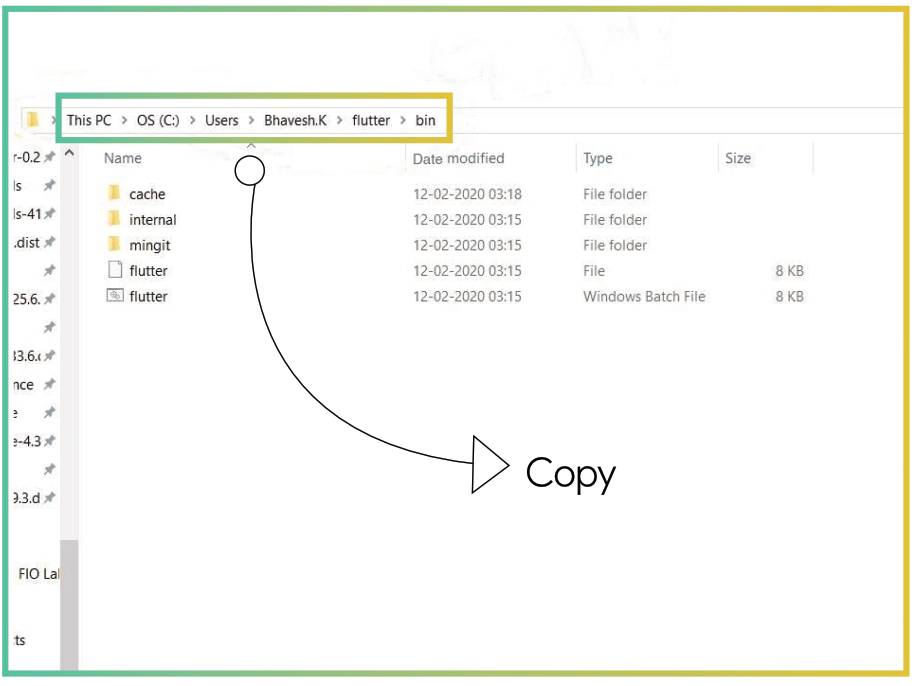
After installing the Flutter, copy the path of the bin folder which is inside the flutter folder, and add a new path to the environment variables as shown in the picture. This is because you could access flutter from anywhere easily.


CREATING A FLUTTER APPLICATION: ANDROID
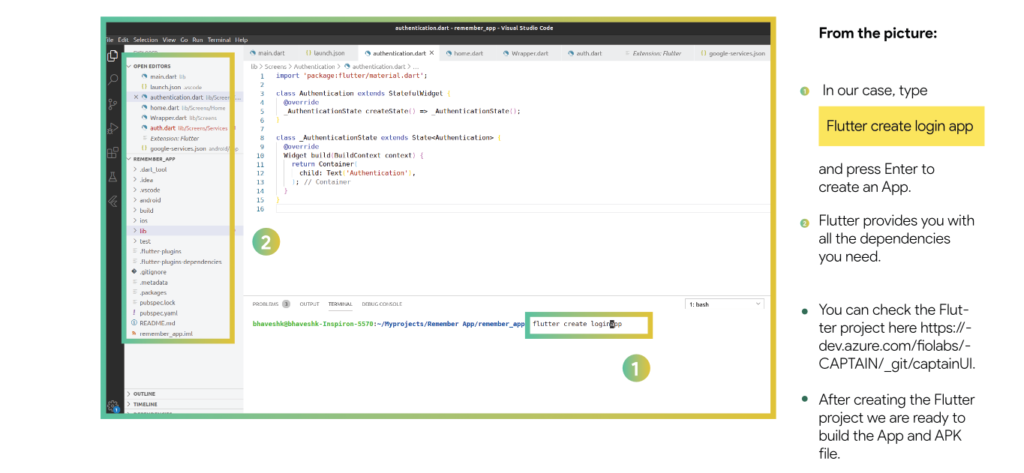
- Create a folder and open Terminal in the VS code editor.
- To create a project, type this command in the terminal:
Flutter create project name

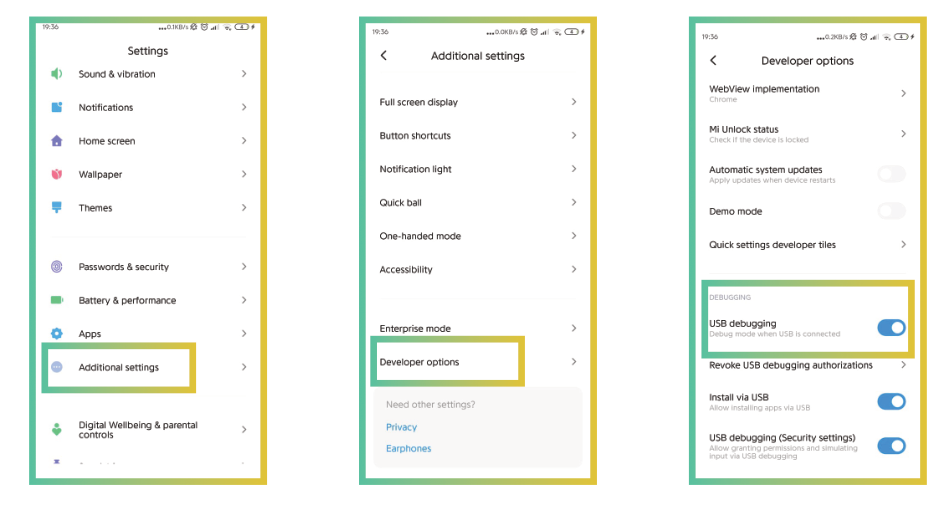
- If you are unable to see Developer options then go to

- If you are unable to see Developer options then go to After reaching the Build Number tap 7 times on it, now you will be able to see the Developer Options and follow the above steps.
- Your mobile is ready in Developing Mode. Open your project in the VS Code Editor. Now, open the terminal and type.
Flutter run
Flutter will automatically search for the external device which you have connected through the USB cable. You can see that in action in the below figure:
Remove the USB cable and you can see the created app in an external device.
CREATING AN APK FILE
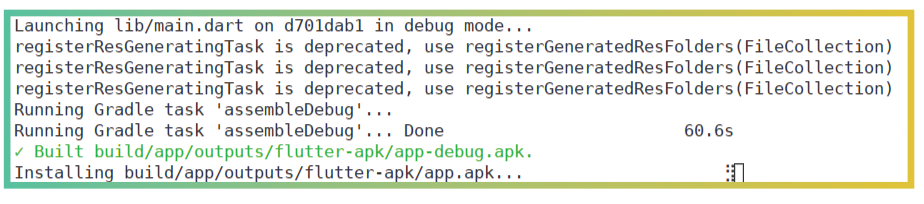
- Open the directory of the project in terminal and type:
flutter build apk
- Flutter will create the APK file in the build folder as shown in the fig.
CREATING A FLUTTER APPLICATION: IOS
- Create a new Flutter app by running the following from the command line:
$ flutter create demo_app
2. A demo_app directory is created that contains all the files and dependencies needed for the app to run.
3. Ensure that an iOS simulator is running to launch the app. Open the simulator by running the following:
$ open -a Simulator
4. Now that the setup is ready to launch the app, run the following commands to change the directory to demo_app and run the app:
$ cd demo_app $ flutter run
5. To launch the app on an iOS device you need the third-party CocoaPods dependency manager. Run the following to install and setup CocoaPods:
$ sudo gem install cocoapods $ pod setup
6. When the app is created in step 1, flutter creates a folder called ios. This folder all relevant file structures to build and run an iOS app. Ensure that you are still in demo_app folder and run the following command to open the workspace project in XCode:
$ open ios/Runner.xcworkspace
7. The runner project opens up in your XCode editor, which might look similar to the screenshot below. Click on the Runner folder to go to the project settings page. Click on the Runner from TARGETS and go to Signing & Capabilities section as shown in the image:
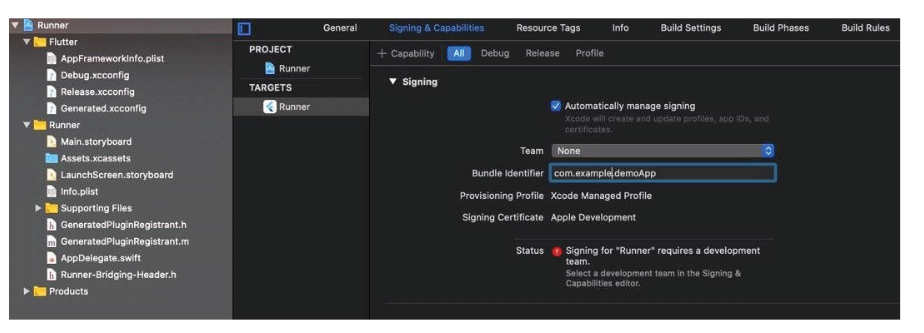
8. You also need an Apple Developer account to deploy the app on your iOS device. So, choose your account from Team dropdown. Alternatively, you can also create a new account from the same dropdown by selecting Add an Account… option.
9. The next step is to specify a unique name for your app bundle. Replace the default bundle identifier com.example.demoApp to your own name (should be unique). In our case, we have replaced it with ai.fiolabs.demoApp
10. Ensure that Status message disappears and a new Signing Certificate is created for the app.
11. Ensure that your device is connected to your Mac via USB and run the following to launch the app.
12. Now type the following command:
flutter run
13. Run the following command to build a deployment package for your app on iOS.
$ flutter build ios
Please note that you might run into version conflicts particularly if you are using XCode version 11.4. If you notice one of the following errors while running flutter run command, please refer to this article on flutter.dev:
Building for iOS, but the linked and embedded framework ‘App.framework’
was built for iOS Simulator. Building for iOS Simulator, but the linked
and embedded framework ‘App.framework’ was built for iOS.
Thank you for being of assistance to me. I really loved this article.